My New Pole Barn Kit How to Build a DIY Backyard Pole Barn
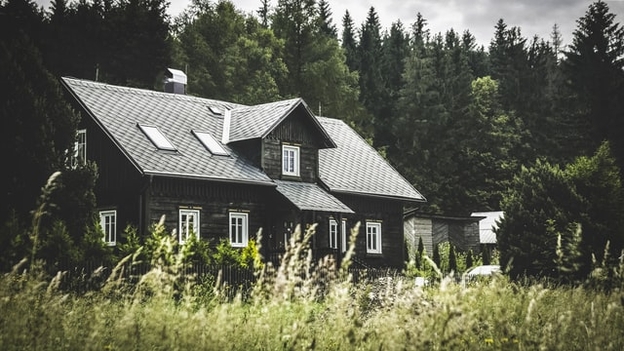
My New Pole Barn Kit is the perfect solution for a backyard DIY project that is easy to assemble. Most barn kits come with everything you need to build your pole barn from scratch!
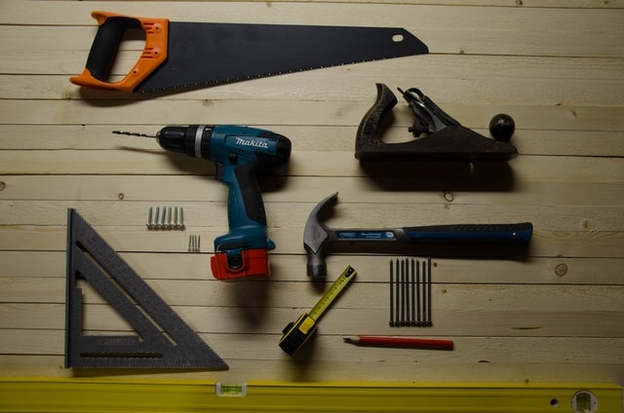
Most Pole Barn Kits include a 12’x12′ base, four posts, 6″x6″ trusses and rafters, 2″x4″s for framing, ridge boards, and roofing brackets. All you need besides this kit is a hammer or power drill-no other tools that are required! A Pole Barn Kit is the perfect choice for those who want to save money on labor costs by doing it themselves or have limited experience in construction.
Even the most inexperienced carpenter can build pole Barn Kits. These Kits will give you a sturdy building for many years to come. Pole Barn Kits are easy and economical to install, making them a popular choice for farmers, ranchers, horse enthusiasts, contractors, or even small businesses who are just starting.
My New Pole Barn Kits are designed with the DIYer in mind that comes complete with everything you need to build. Most kits are delivered to your door for a fast and easy way to make your pole barn. Kits come in all shapes, sizes, and colors, depending on what you need.
My New Pole Barn Kit is the perfect solution for a backyard DIY project that is easy to assemble. Most barn kits come with everything you need to build your kit from scratch!
Pole Barn Kits
pole barns are typically associated with farming communities but can be used for all sorts of purposes. my pole barn kit is an excellent project for those who want to save money on labor costs by doing it themselves.
Give your pole barn any purpose you desire: home office space (primarily if you work from home), an extra bedroom or living room that opens up into the yard-the possibilities are endless. These kits offer are very straightforward to put together and can be built by anyone! There is no need for specialized tools or skills.
What is a pole barn kit?
My new pole barn kit is a simple DIY project that anybody can do with some handyman skills. It comes with all the materials necessary for construction, so you do not need to purchase additional materials. If you are looking to build your pole barn from scratch, here’s how to do it.
What You Will Need:
– pole barn kit (which will typically come with four posts, 6″x6″ trusses and rafters, 2″x4″s for framing, ridge boards, and roofing brackets)
– hammer or power drill
– Philips’s screwdriver
– level
– tape measure or ruler
Step 1: Setting up posts Place your pole barn kit on flat ground, then lay the first post into position. Make a mark at approximately four feet from each side of the pole. This is when you set the pole in concrete. Use the level to make sure the pole is straight and properly seated, then use a Philips screwdriver to secure the pole.
Step 2: Attaching the ridge board Next, you will need to attach your pole barn kit’s ridge board, a helpful guide for installing your trusses. First, measure out 16 feet from each pole end and mark this as the long wall on your pole barn. Next, mark 16′ from each of these marks to make a rectangle out of these points. The pole should be in the center of this rectangle.
Lastly, use a level to ensure that your pole is straight and secure it with screws into the center pole.
Step 3: Attaching Trusses Now, you will attach the pole barn kit’s trusses to the pole. You will need two more posts; make sure they are spaced 16′ apart from each other.
Attaching these is similar to securing the pole. Place them slightly over 12′ from either end of the pole and one a level to ensure that pole is straight. Then, screw them into the pole using the Philips screwdriver.
Step 4: it’s time to attach the pole barn kit’s rafters to the trusses. You will need two ridge boards located at either end of the pole barn kit for this step. Please make sure they are level with each other and the pole to ensure that your pole barn is level? Then use a Philips-head screwdriver to secure them into position.
Step 5: Attaching diagonal support After you have finished attaching the ridge boards, it’s time for you to install diagonal support (known as purlins). You will need two additional posts for this step that are placed every 24″ from each pole. Screw these into the pole using a Philips-head screwdriver.
Step 6: Installing plywood sheets Now, you will need to install sheeting on top of everything you have just built. The pole barn kit will include two sheets of plywood that measure 12 feet by 24 feet and 1/4″ thick. Seat these on top of the diagonal support and secure them using 1-1/4″ nails or screws.
Step 7: Attaching sheathing to pole barn Now, you will want to install sheathing over the plywood sheets that you have just installed. The pole barn kit should include a sheet that measures 12 feet by 24 feet and is 3/8″ thick. Seat this sheet on top of the pole barn, ensuring that all edges are adequately secured with 1-1/4″ nails or screws.
Step 8: Adding siding When you have finished your pole barn, it’s time to add the exterior siding. The pole barn kit will include a 4 x 8 sheet of siding that is 3/8″ thick. Seat this on top of the pole barn and secure it in place using 1-1/4″ nails or screws. That’s all you need to do to build your pole barn kit!
Why pole barn kits are better than other types of kits
The pole barn kit is assembled like a puzzle. You don’t need any particular skill or expensive tools-everything you need is included in the kit. Homeowners save up to 50% on labor costs with pole barn kits, and it can take as little as three days to assemble a pole barn kit with only one person.
No other materials are needed besides the pole barn kit, so everything is included in the price. For those who are more experienced with construction, pole barn kits make for an easy project, and assembly can be done in less than three days. For those who don’t have a lot of experience, pole barn kits are easy to assemble and can be built by one person.
Usually, pole barn kits take around three days to build. Most backyard pole barns cost around $3,000 for pole barn kits. Pole Barn Kits can come with everything you need except cement or shingles.
Where can I buy pole barn kits?
You can buy my pole barn kits at places like pole barn home. Many pole barn kits come with roofing and siding as well, so this may be a better choice than building your pole barn from scratch.”
Pole Barn Kit reviews and testimonials
My new pole barn kit was delivered on time, and I have no complaints about the quality. It’s easy to put together, but I would recommend using a power drill or hammer. My pole barn kit has been very durable and can withstand anything that mother nature throws at it.
If you’re looking to get a pole barn kit, I recommend My pole barn Kit. – Josh C., Milwaukee, WI
My new pole barn kit was straightforward to assemble, and it took me about one week to finish my pole barn. It was fun, and I saved money by doing the work on my own. After completion, the pole barn looks excellent, and I would recommend a pole barn kit to anyone who wishes to build their pole barn. – Kevin B., Bend, OR
My pole barn kit was delivered in perfect condition, and I have had no problems with the quality or assembly of the pole barn. It’s been an excellent investment for my family, and we’ll be using it for many years to come. – Jesse P., Charlotte, NC
The pole barn kit was very detailed in its assembly instructions, and it was easy to put together by myself. I built my pole barn at a fraction of the cost that other pole barn kits would have charged me with the pole barn kit. I had no problems with my pole barn kit, and I would recommend it to anyone looking to build their pole barn. – Kevin B., Minneapolis, MN
My pole barn kit is one of the best investments I have made at my home so far. It’s easy to put together and very sturdy when you’re done building it. I am a professional who
FAQs About My New Pole Barn Kits
What pole barn kit should I get?
The choice of pole barn kit largely depends on the size of pole barn that you are building. For pole barns with bases of 12’x12′, you would use four posts, 6″x6″ trusses, and rafters. For pole barns with floors of 8’x8′, you would only need two posts and four trusses or rafters.
If you have a smaller pole barn, such as a pole barn base of 6’x6′, then one post and three trusses or rafters are what you will need. The pole barn kits include everything that you need except for tools.
Please note that pole barn kits are sold as a set. If you would like to build multiple pole barns, then you must buy various pole barn kits. Each pole barn kit will include all the materials and hardware needed for one pole barn.
![]()
My pole barn kit is an excellent investment for those looking to get something easy to assemble and build by one person. If you want to save money on labor costs, pole barn kits make for an easy project, and assembly can be done in less than three days.
My Pole Barn Kits also come with everything you need except cement or shingles. A pole barn kit is a perfect choice for those who wish to build their pole barn without the cost of building materials.
Another bonus of pole barn kits is that they give off a rustic vibe to your backyard and look fabulous no matter where you put it in your yard.
Pole barn kits are also an excellent investment for those who don’t have much experience in building. Pole Barn Kits are detailed, and step-by-step instructions with pictures make pole barn kits the perfect choice for DIY projects.
If you want to build your pole barn on a budget, pole barn kits are the perfect option since they are sold at a fraction of the cost of pole barns that you can buy from stores.
Building your pole barn is manageable with my pole barn kit because pole barn kits come with very detailed step-by-step instructions and pictures, saving you time in assembly.
My Pole Barn Kits are also great for those who want to build their own on a budget because they are sold at the lowest prices in the market.

